Making of Photography School in Nantes
The project
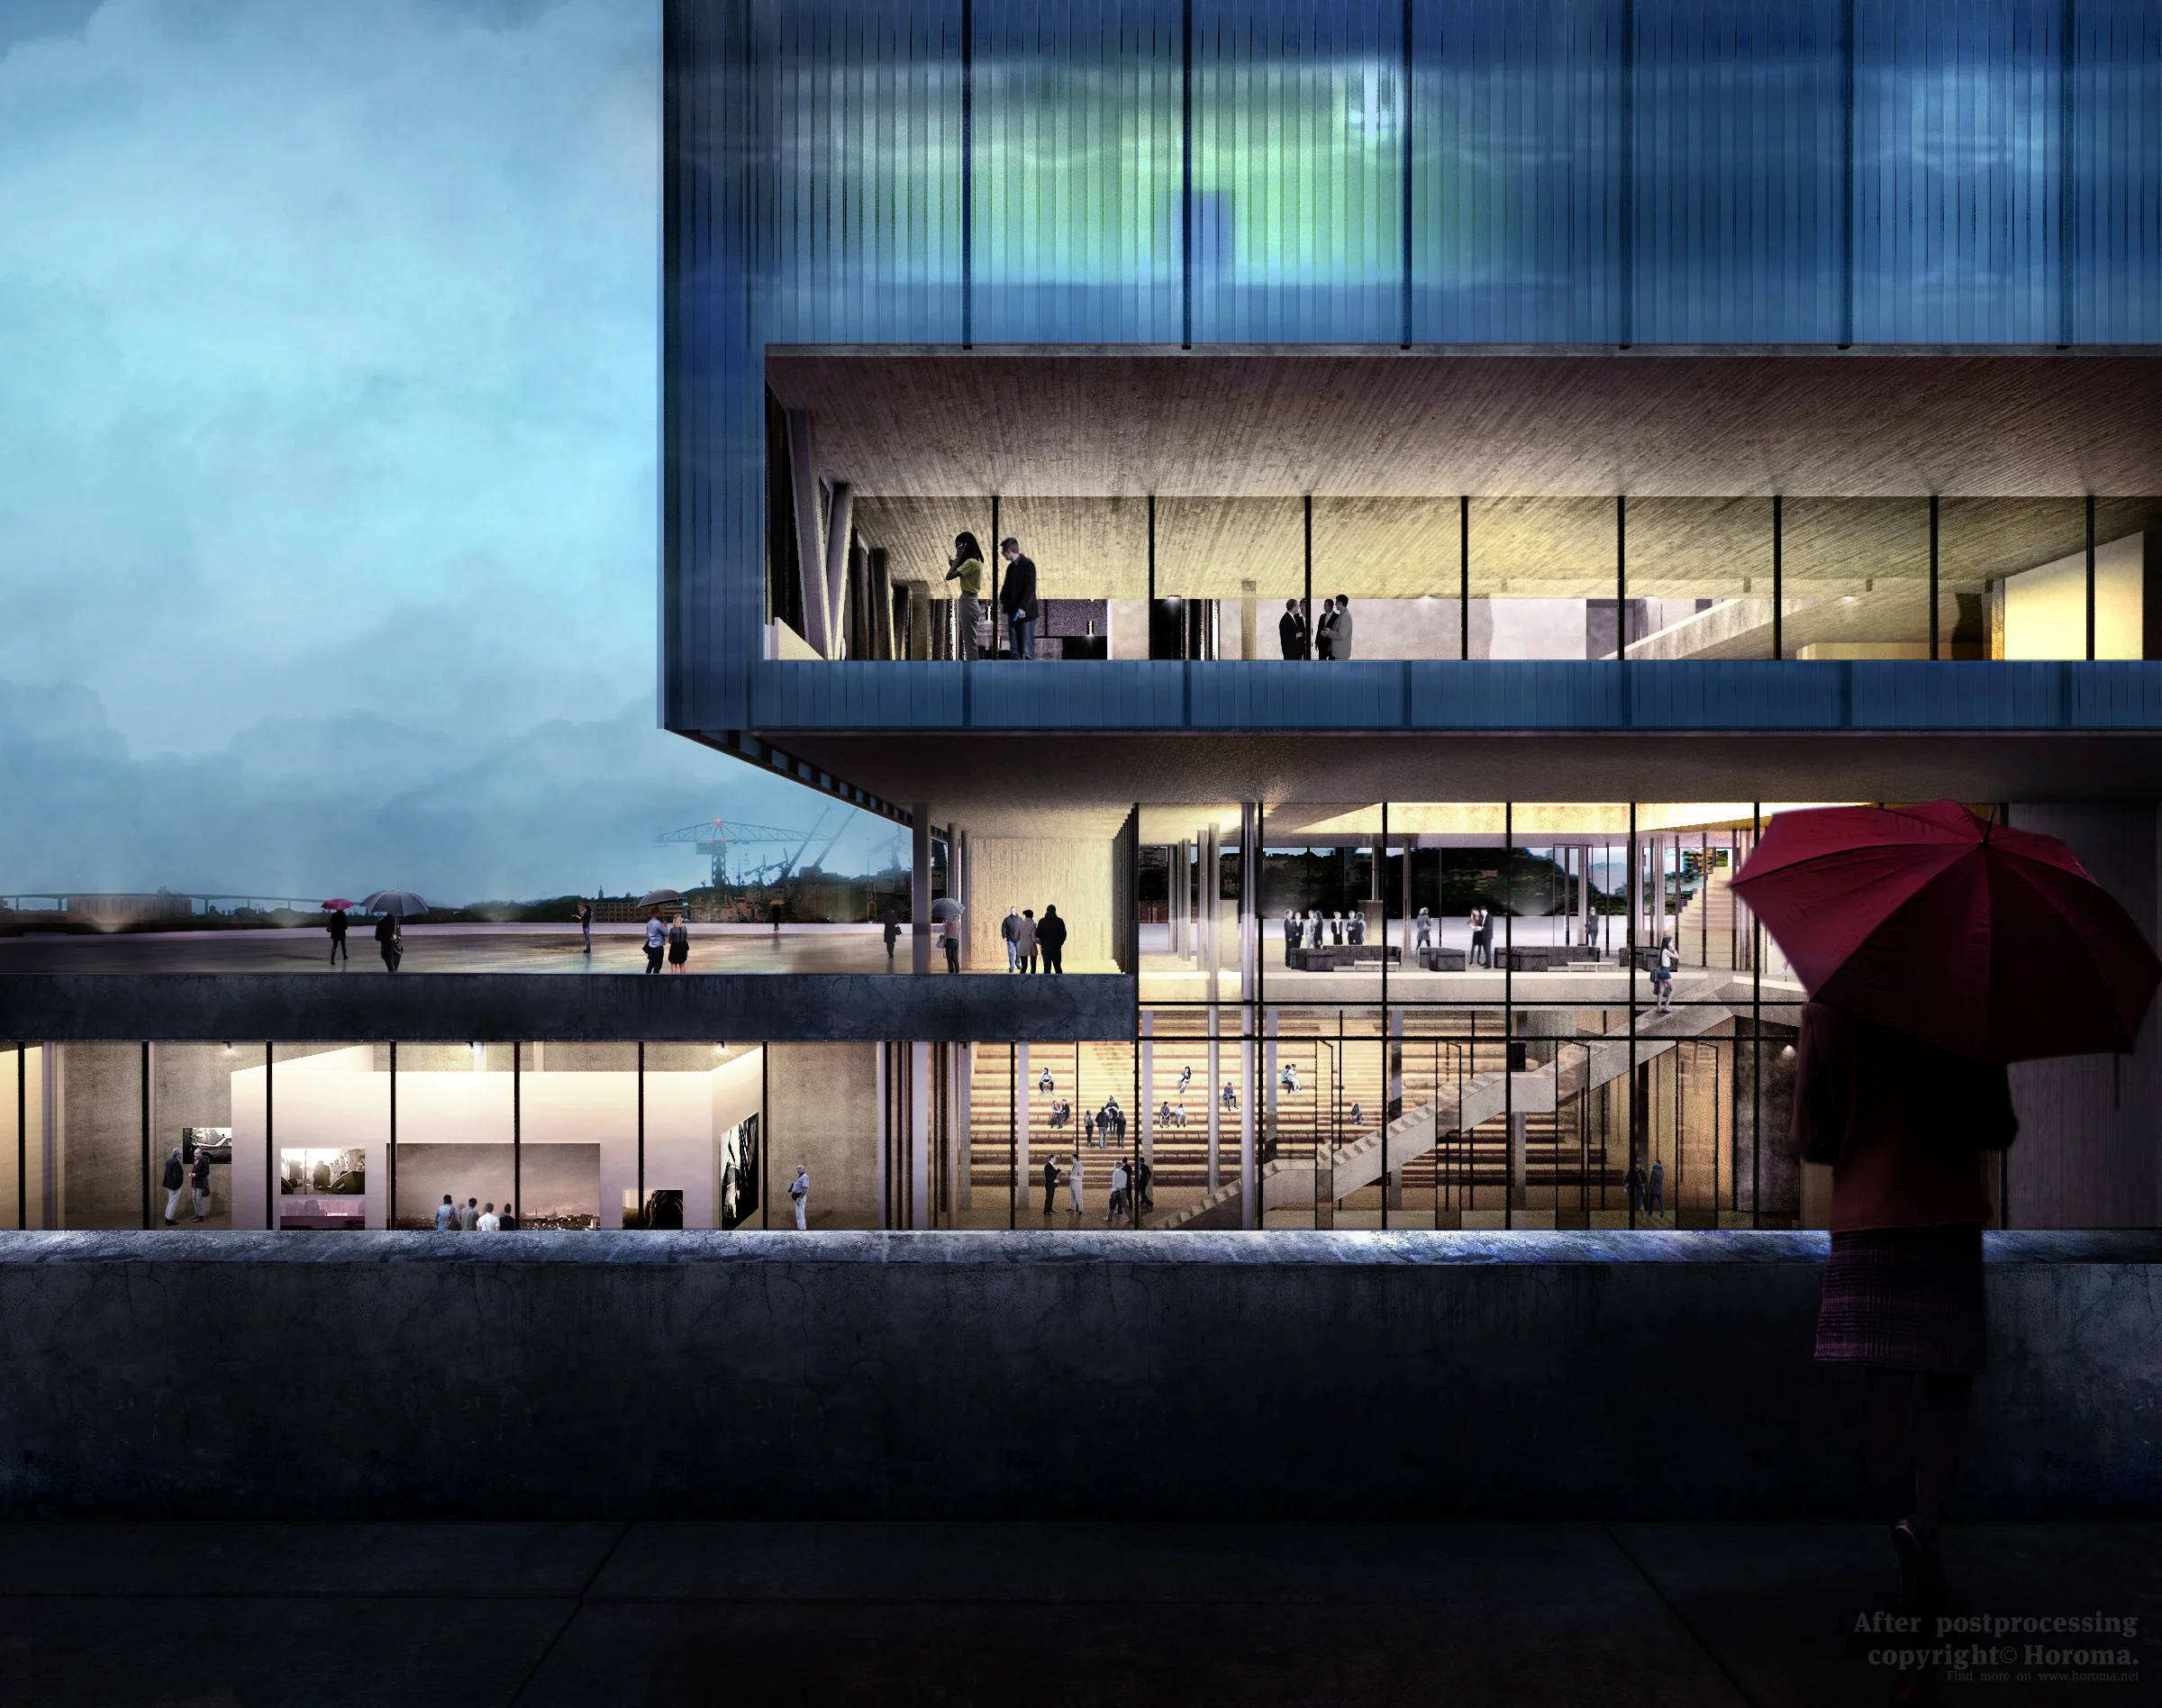
The project is a photography school in the port area of Nantes. It was designed by student Pauline Personeni at the École Nationale Supérieure d'Architecture de Strasbourg.
The project consists of a translucent box cut through by a large atrium connecting all the levels. The ground floor is totally open and runs indifferently indoor and outdoor giving the box a floating impression since it overlaps an adjacent excavated space. Exhibition space and lecture hall are underground, widely open to the excavated exterior public space while administration space and lecture rooms are in the upper levels.
A dusk/night render with the building lit inside with artificial lights seems like a good choice to convey the different concepts of the building since it will help emphasize the translucency contrast between the materials and the openness of the space inside.
Here's how I proceeded, step by step.
1. Render the model
The base render is straightforward. A simple dusk HDRI from my personal collection, a VRay dome light, and VRay Light Planes with different intensities and temperatures are scattered across the building.
Texture wise, I used a Multitexture map for concrete to avoid repetition on the tiles (not really visible here, but it is on other points of view), glass with full refraction (IOR 1.0) and reflection (with subtle noise bump map), and more translucent glass to get a base for my polycarbonate (playing with fog multiplier).
View fullsize
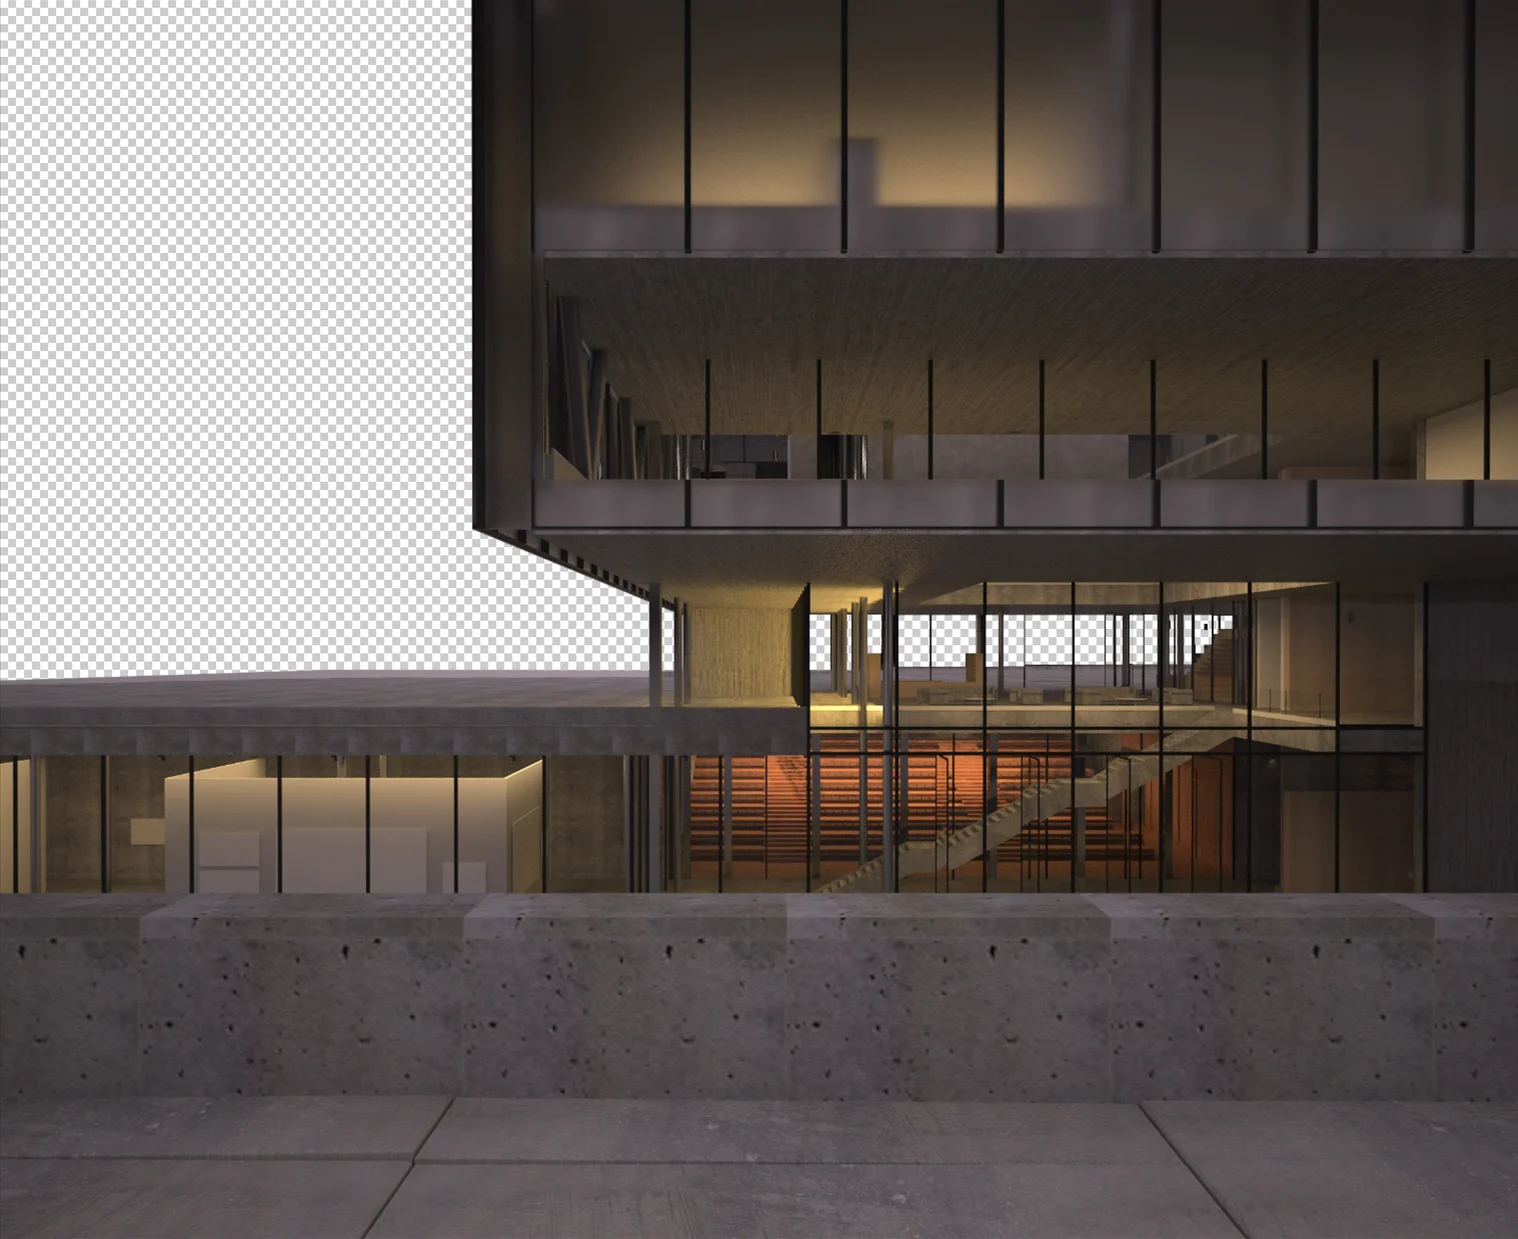
The base render straight out of 3ds Max 2015
2. Tweak the base render
First things first, I always switch to black and white before even beginning.
It helps concentrate on the composition and the lighting, leaving the colours for the end.
View fullsize
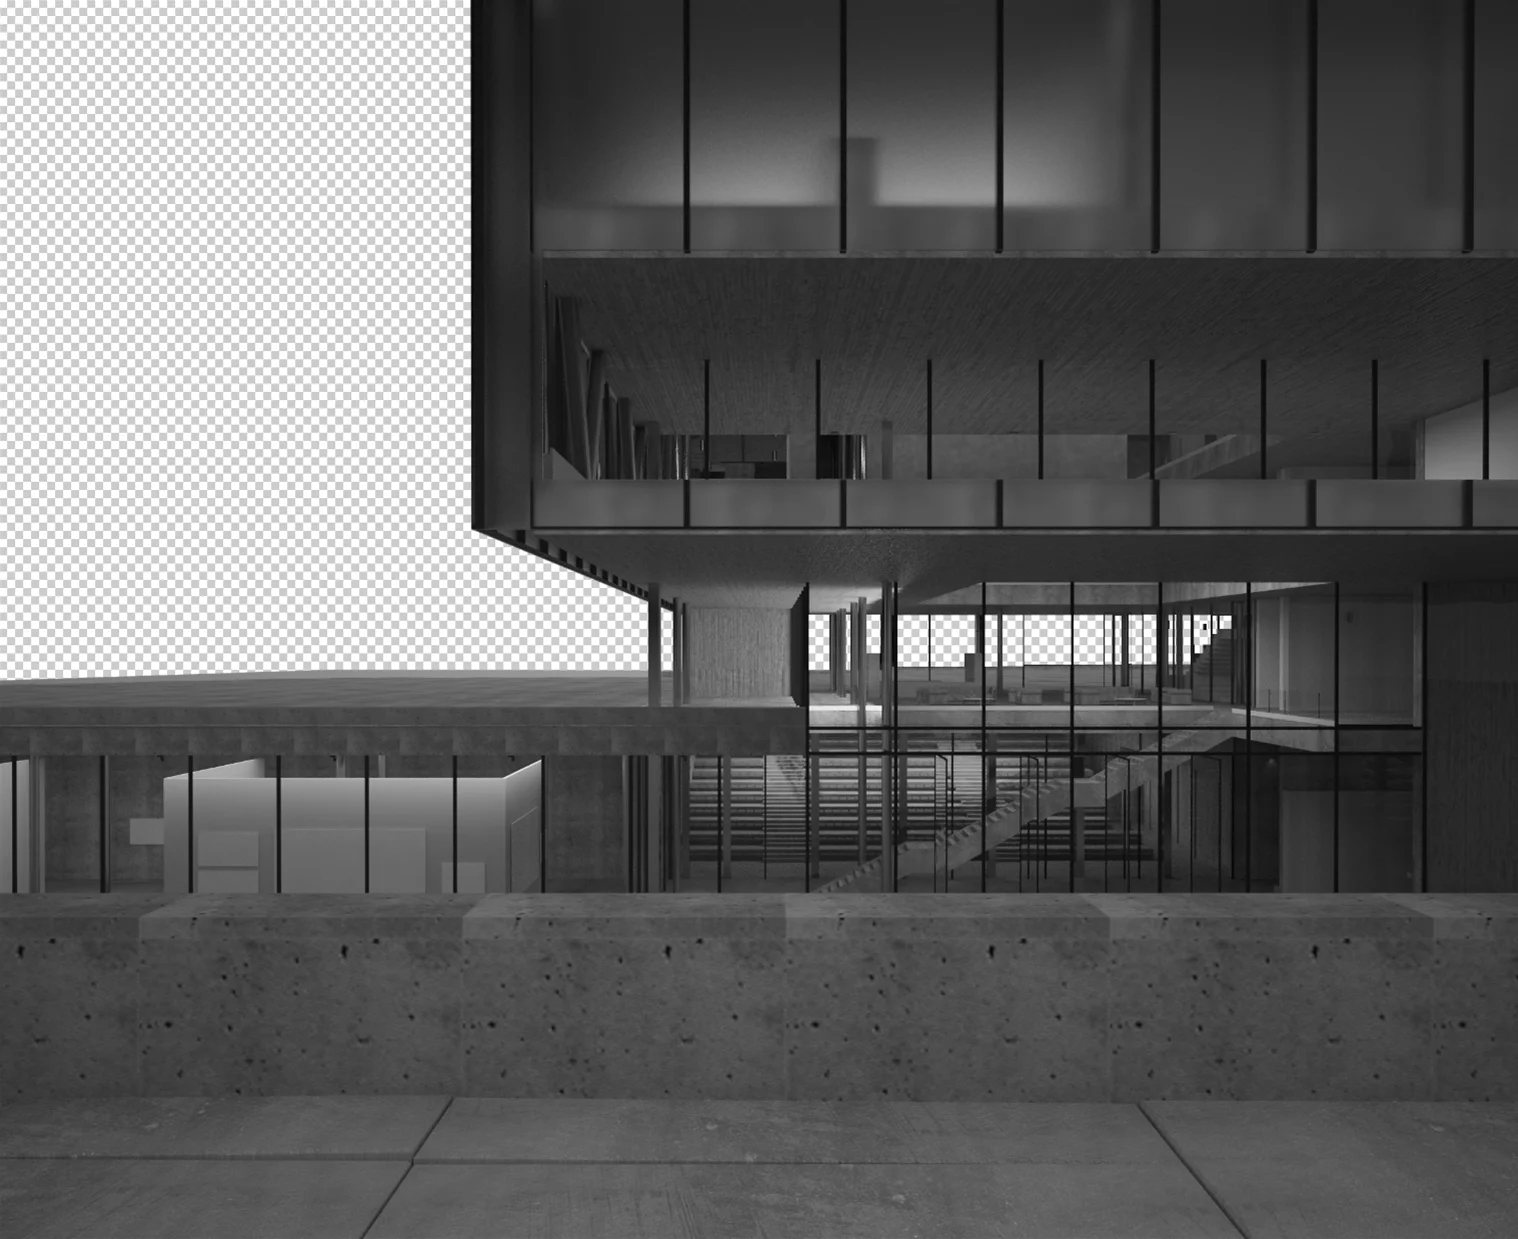
The base render in black and white. The colours disappear and you don't get caught by unrealistic colours, and details anymore.
This is where you start writing down all the big and little adjustments you'll have to do.
You can use the count tool (under the eyedropper drop down menu) to add little notes on your image without distracting too much. It helps you keep track of what you're doing. Or just use a piece of paper. But do write down what you intend to do so that you don't forget anything along the way.
First step here is redoing most of the textures :
- The tiling of the concrete was a bit too obvious, so applying another texture (multiply blend mode) and playing with the stamp tool I can make it a bit more random and also add some decals
- The polycarbonate is from a photograph I tiled and randomized using the same technique as above. Blending mode is set to vivid light.
- I also add the photos in the exhibition space downstairs
View fullsize
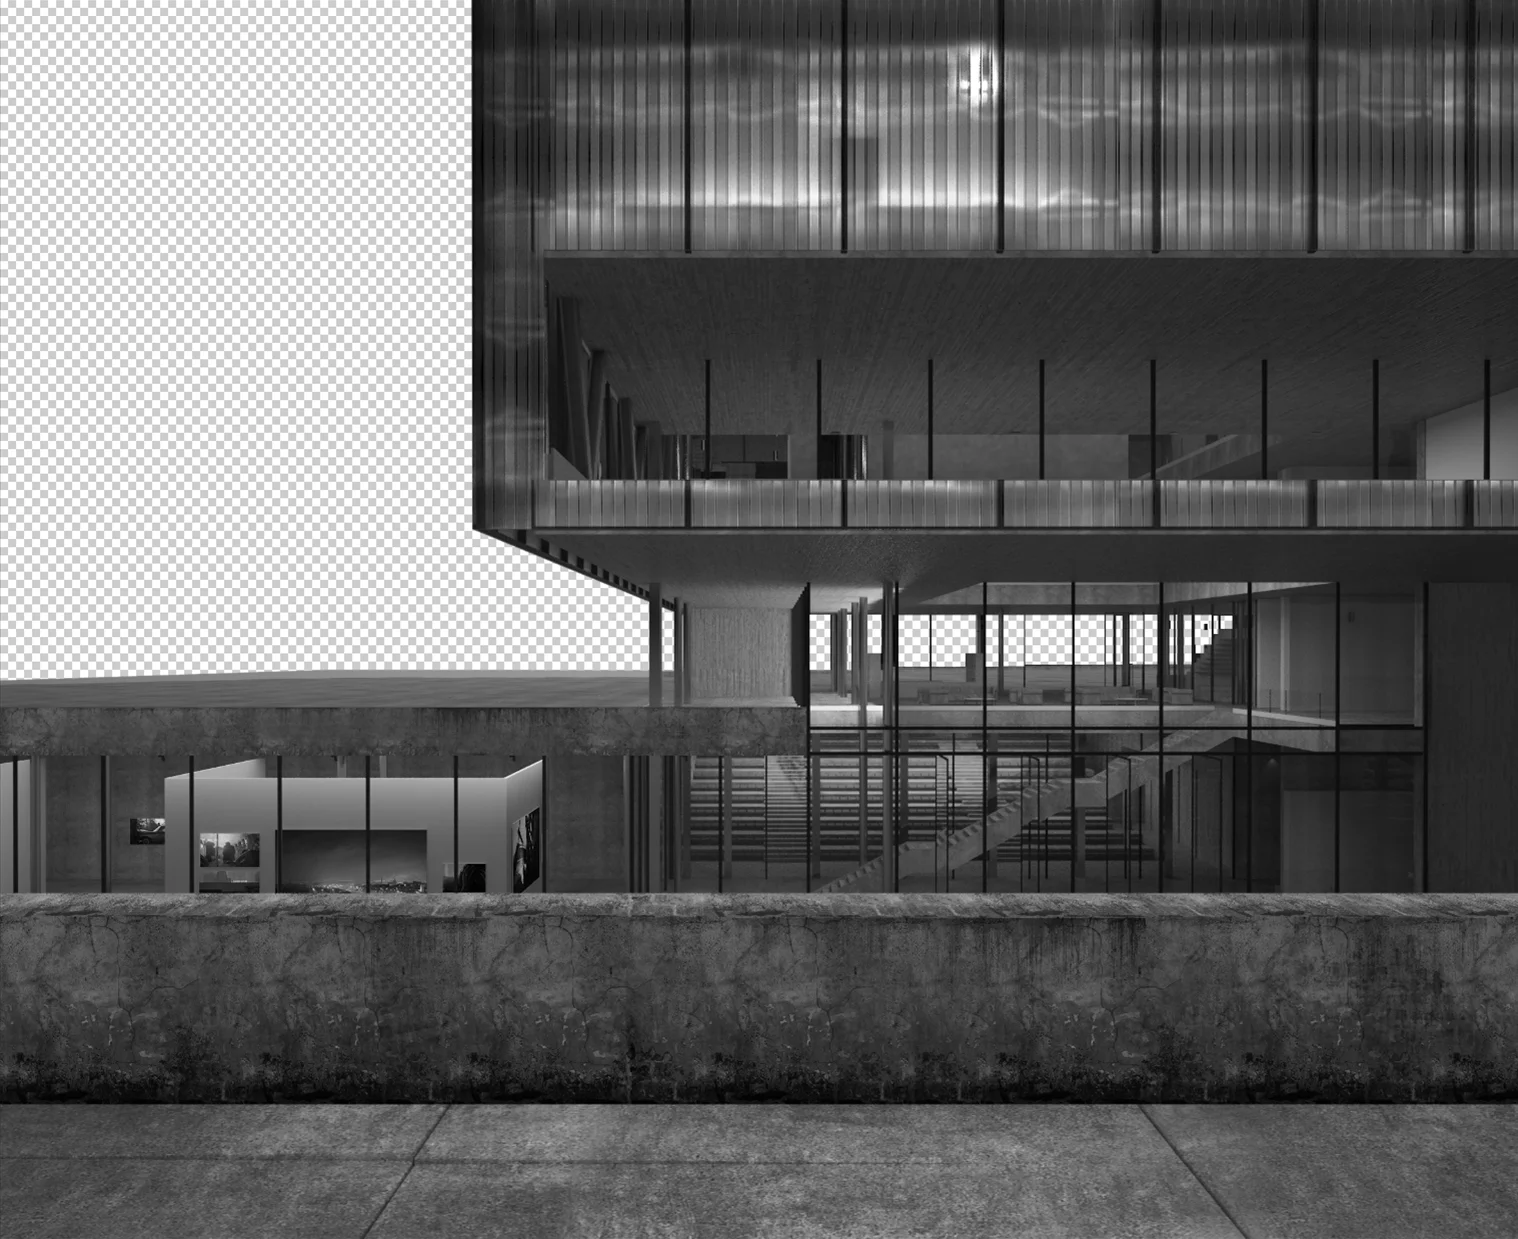
The base render with more refined textures applied
3. Adjust lighting
Once all the materials are tweaked properly, it's time to work on the lighting. Black and white is, in my opinion, much more efficient (and easy), to work on lighting.
Using a mix of located curves adjustments and a burn/dodge on certain area, we manage to get more punchy lights in some area, and more subtle ones through the polycarbonate, and get the light box effect we're looking for.
The rule here is pretty simple, a picture will only look good if it looks perfect in black and white. If something is off in the black and white version, there's no way it's going to look better in colour. So spend as much time as you need on this step before going to the next one.
What makes a black and white picture looks good? I'll talk more extensively about these subjects in other posts to come, but basically :
- It's always a matter of composition : here we have a frontal view, with a low wall in the foreground that emphasizes the void between the building and our point of view, without seeing it too much. The background gives an industrial or harbour feel with the cranes that help set the mood. The rule of third is also followed here : horizontally the lower third is our low wall whereas the top two thirds is our building. Vertically, the left third is the background and the city far away, the right two thirds is our building. This simple composition helps in giving a structure to the image
- There always should be contrast : trying to achieve our lightbox effect, surroundings are quite dark and we have different shades of grey (artificial light) depending on the materials. The background is lit, probably by the city lights nearby.
- Work on depth : here we have at least 4 levels of depth (they will be more obvious once we put people in the image). The foreground, the exhibition space and balcony, the lobby space and lecture hall, and the background.
- Details : don't overdo it, but what will make your image stand out is also the amount of little details you'll manage to put in your image. Whether it is materials (the polycarbonate effect here), shadows (small V cast shadows from the windows frames) etc.
- Even though it is in black and white, avoid pure black and pure white since they don't exist in real life (there will always be a tiny bit of light to avoid pure black, or never enough light and smoothness to get a perfect white)
View fullsize
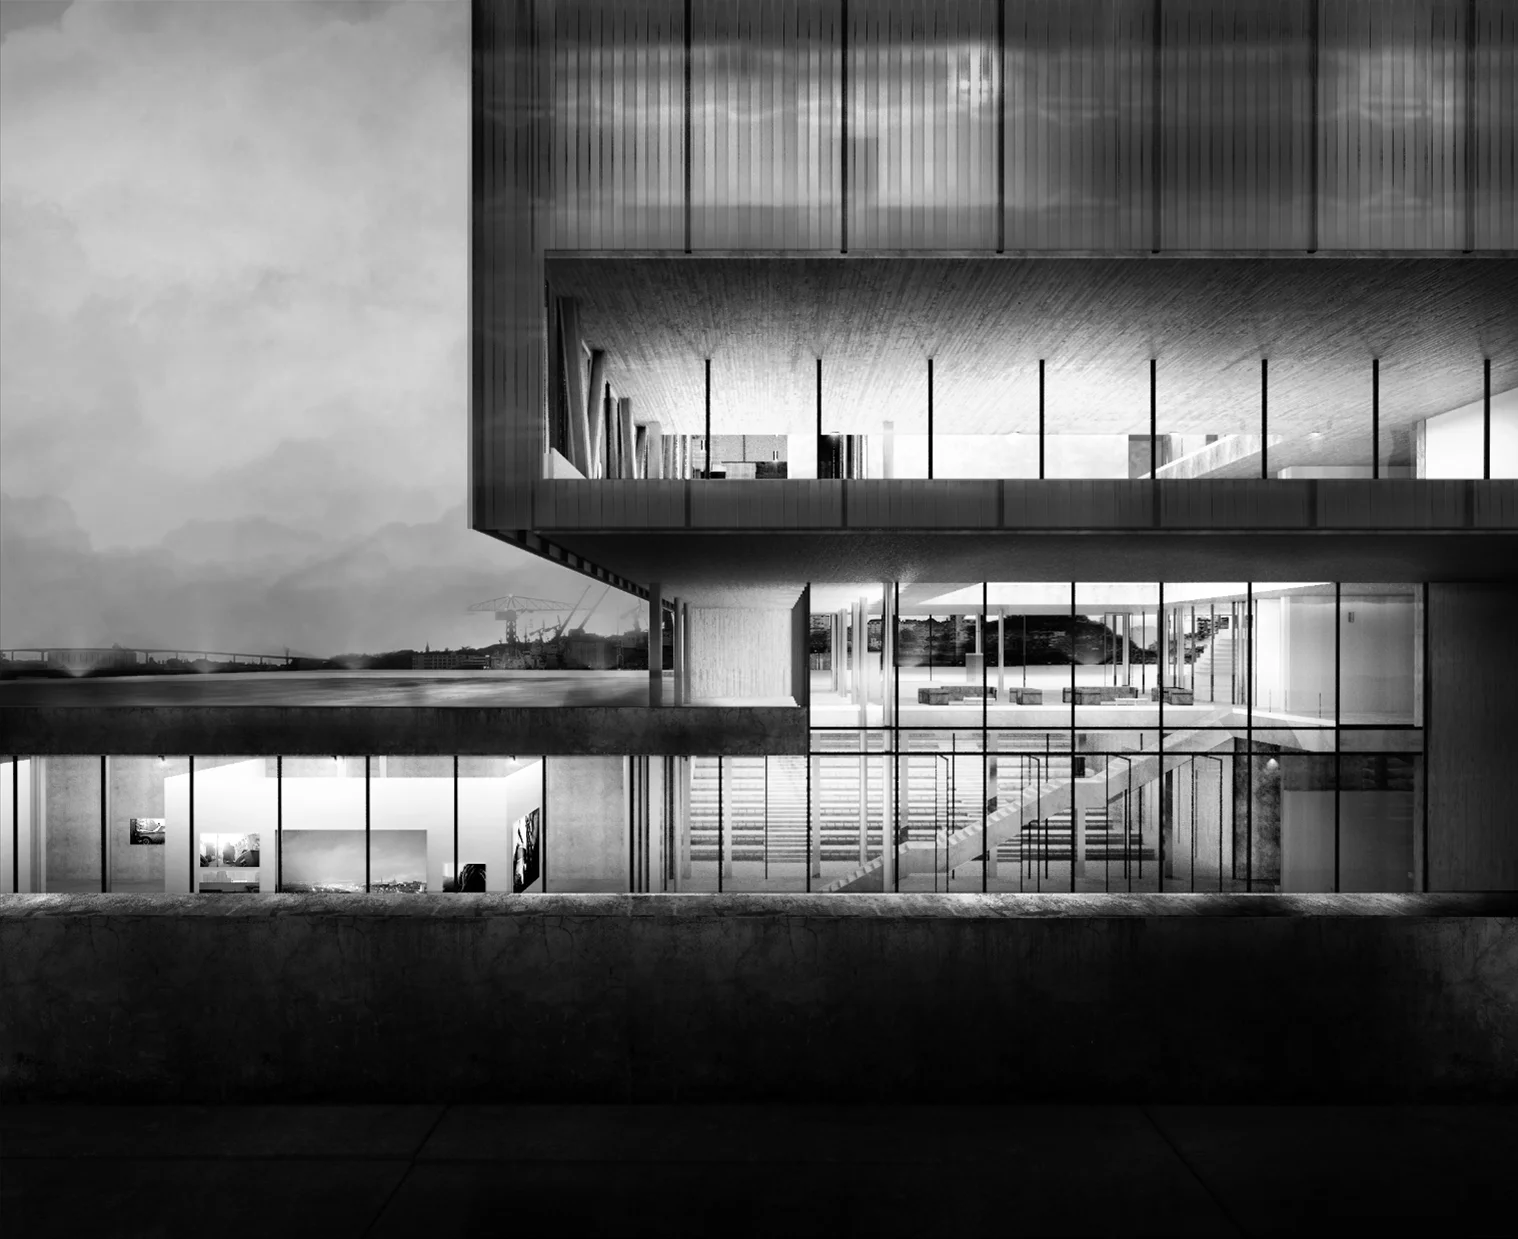
Only with curves adjustments and dodge/burn, we manage to get a totally different atmosphere here, and get this film noir like feel
4. Populate
Now that the image is looking good in black and white, we can start to populate it. The same way you need to keep composition in mind when you choose your point of view, you also need to keep it in mind when you place people. The idea here is to create a coherent story while not overshadowing the building.
In our case, we're in the evening, the lecture is finished and people recently got out of the lecture hall. Some are in the exhibition space on the left, others are gathering on the upper level in the lobby or the balcony above. Outside people were talking while waiting for the rain to stop. On the right, one character anchors the whole foreground while watching this everyday life show. This story has to be easily legible and serve the project idea.
View fullsize
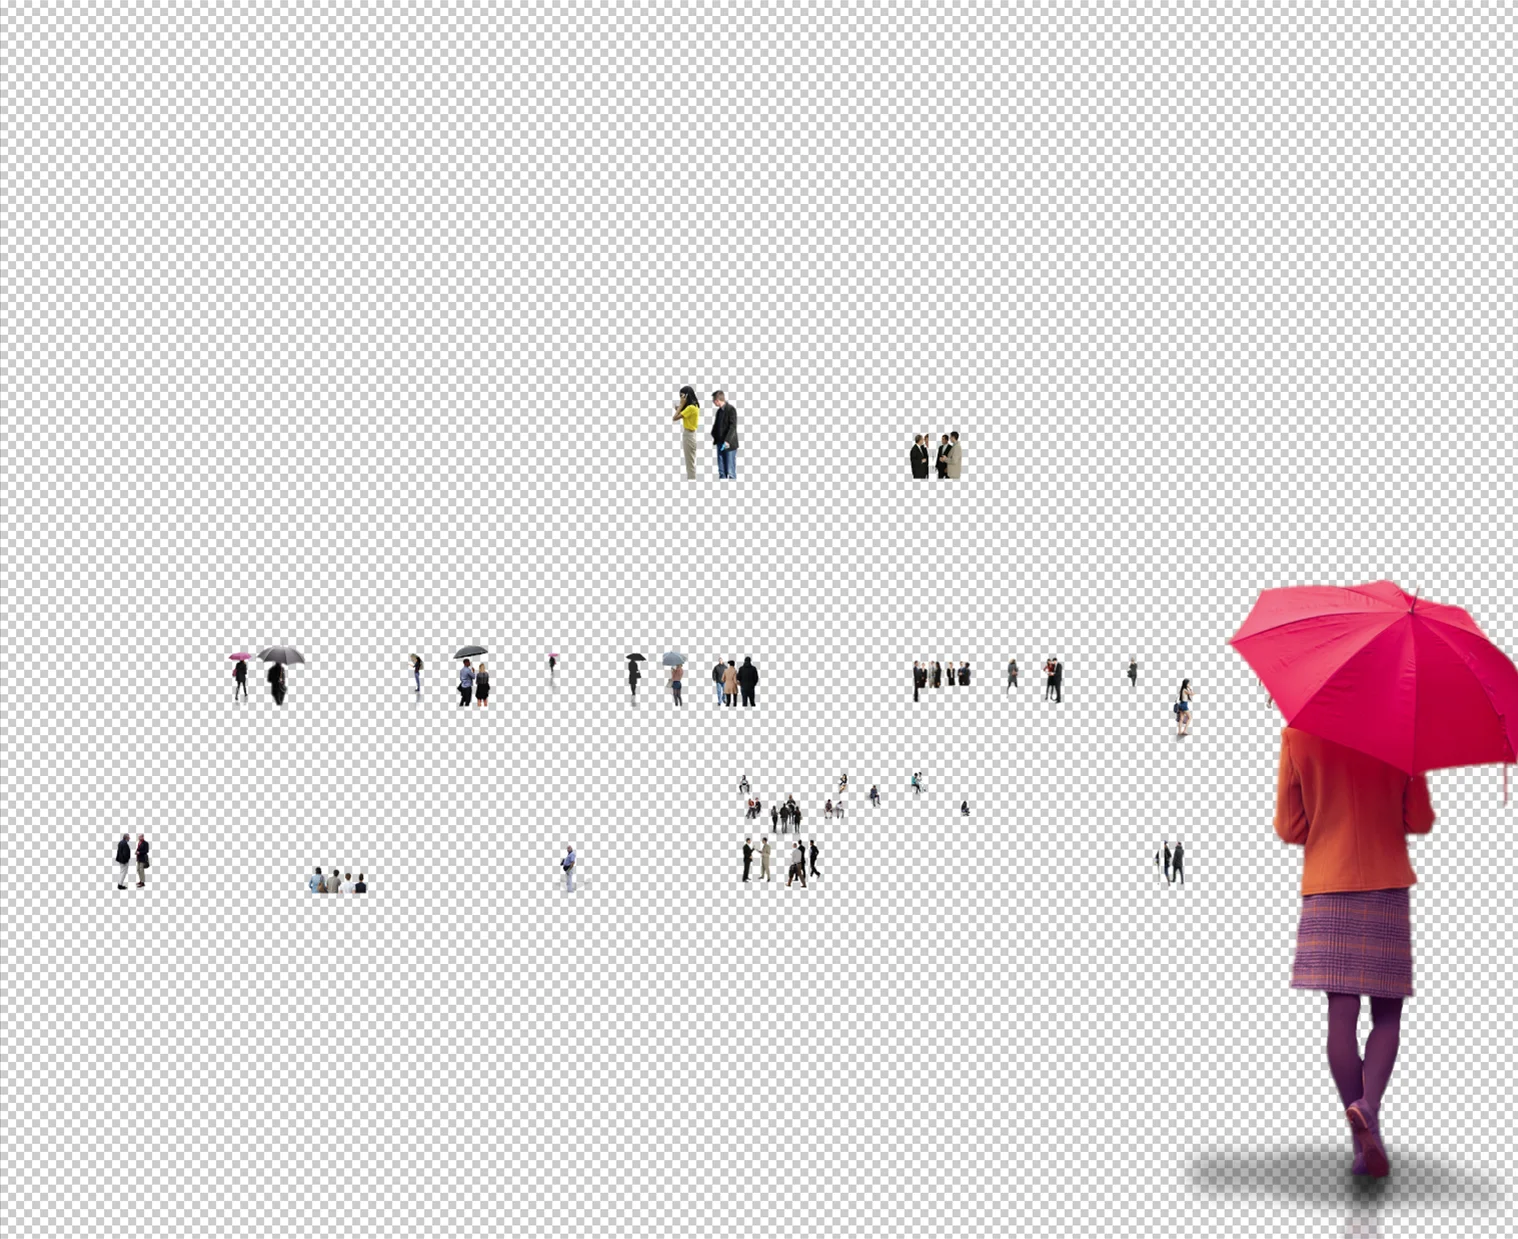
People photoshop group, without any adjustments
View fullsize
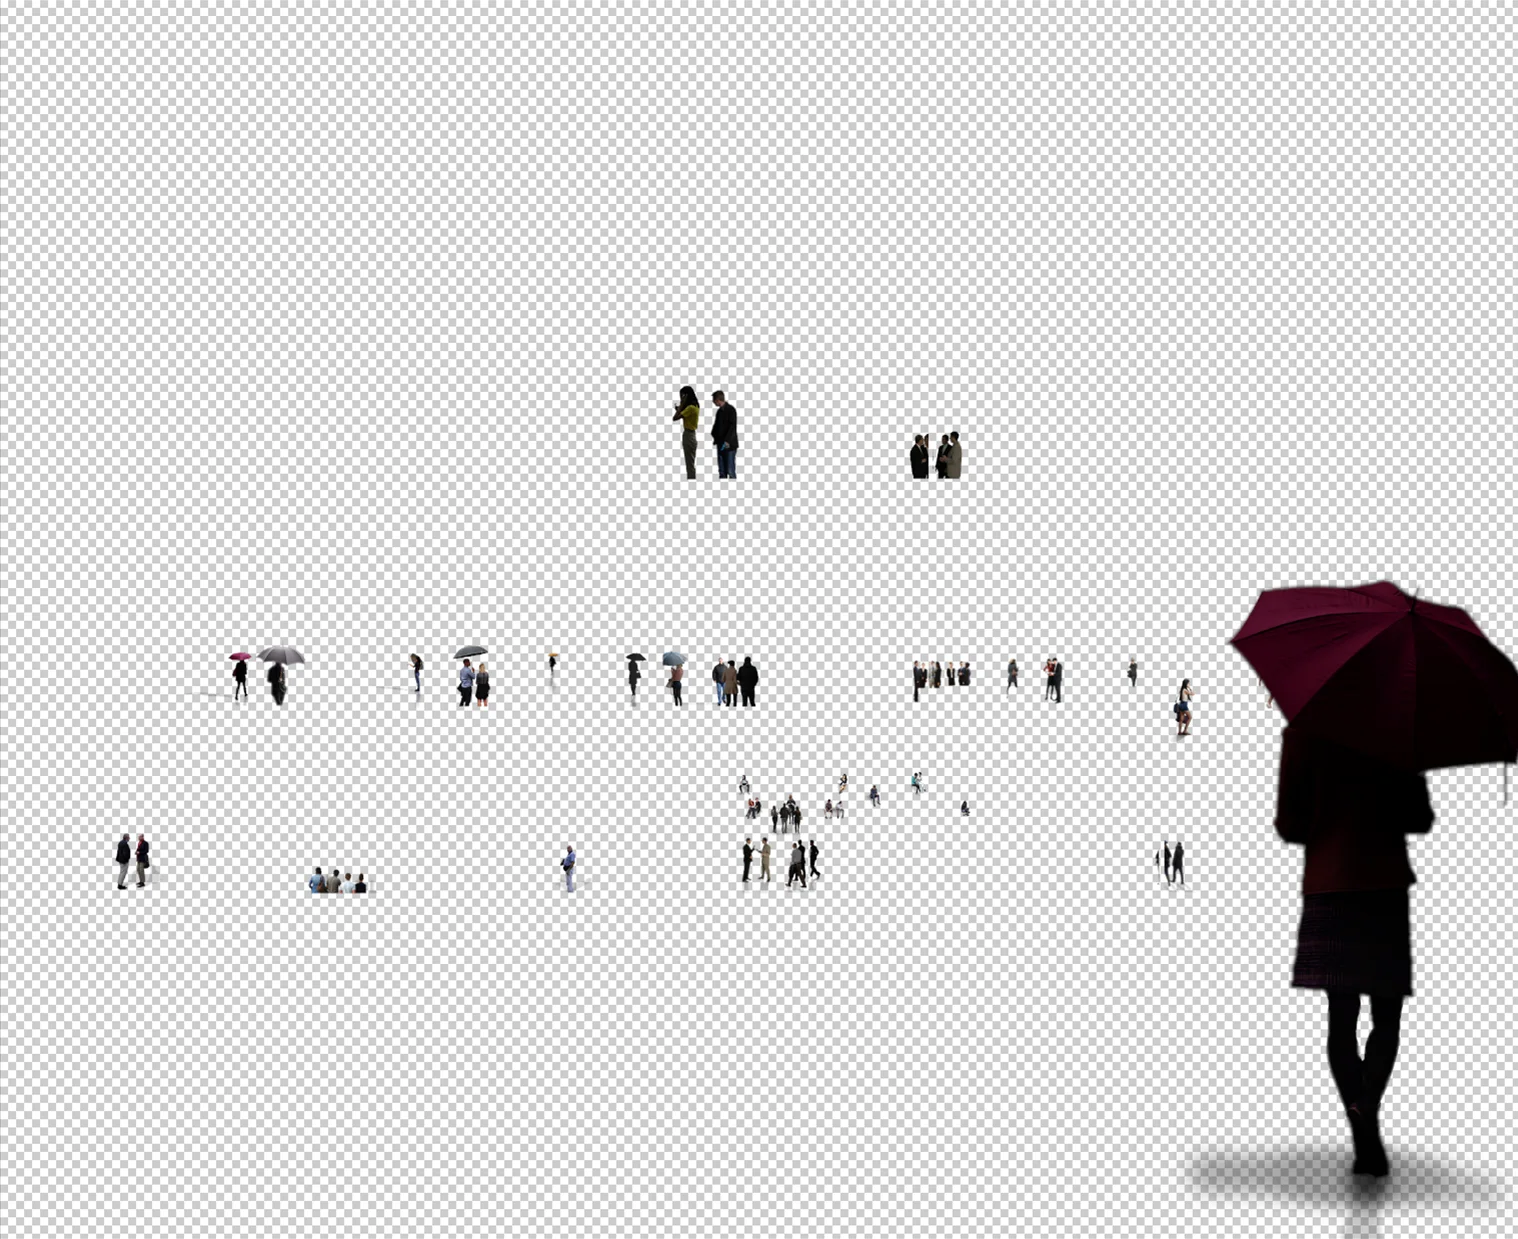
People photoshop group, with light and saturation adjustments and cast/core shadows
View fullsize
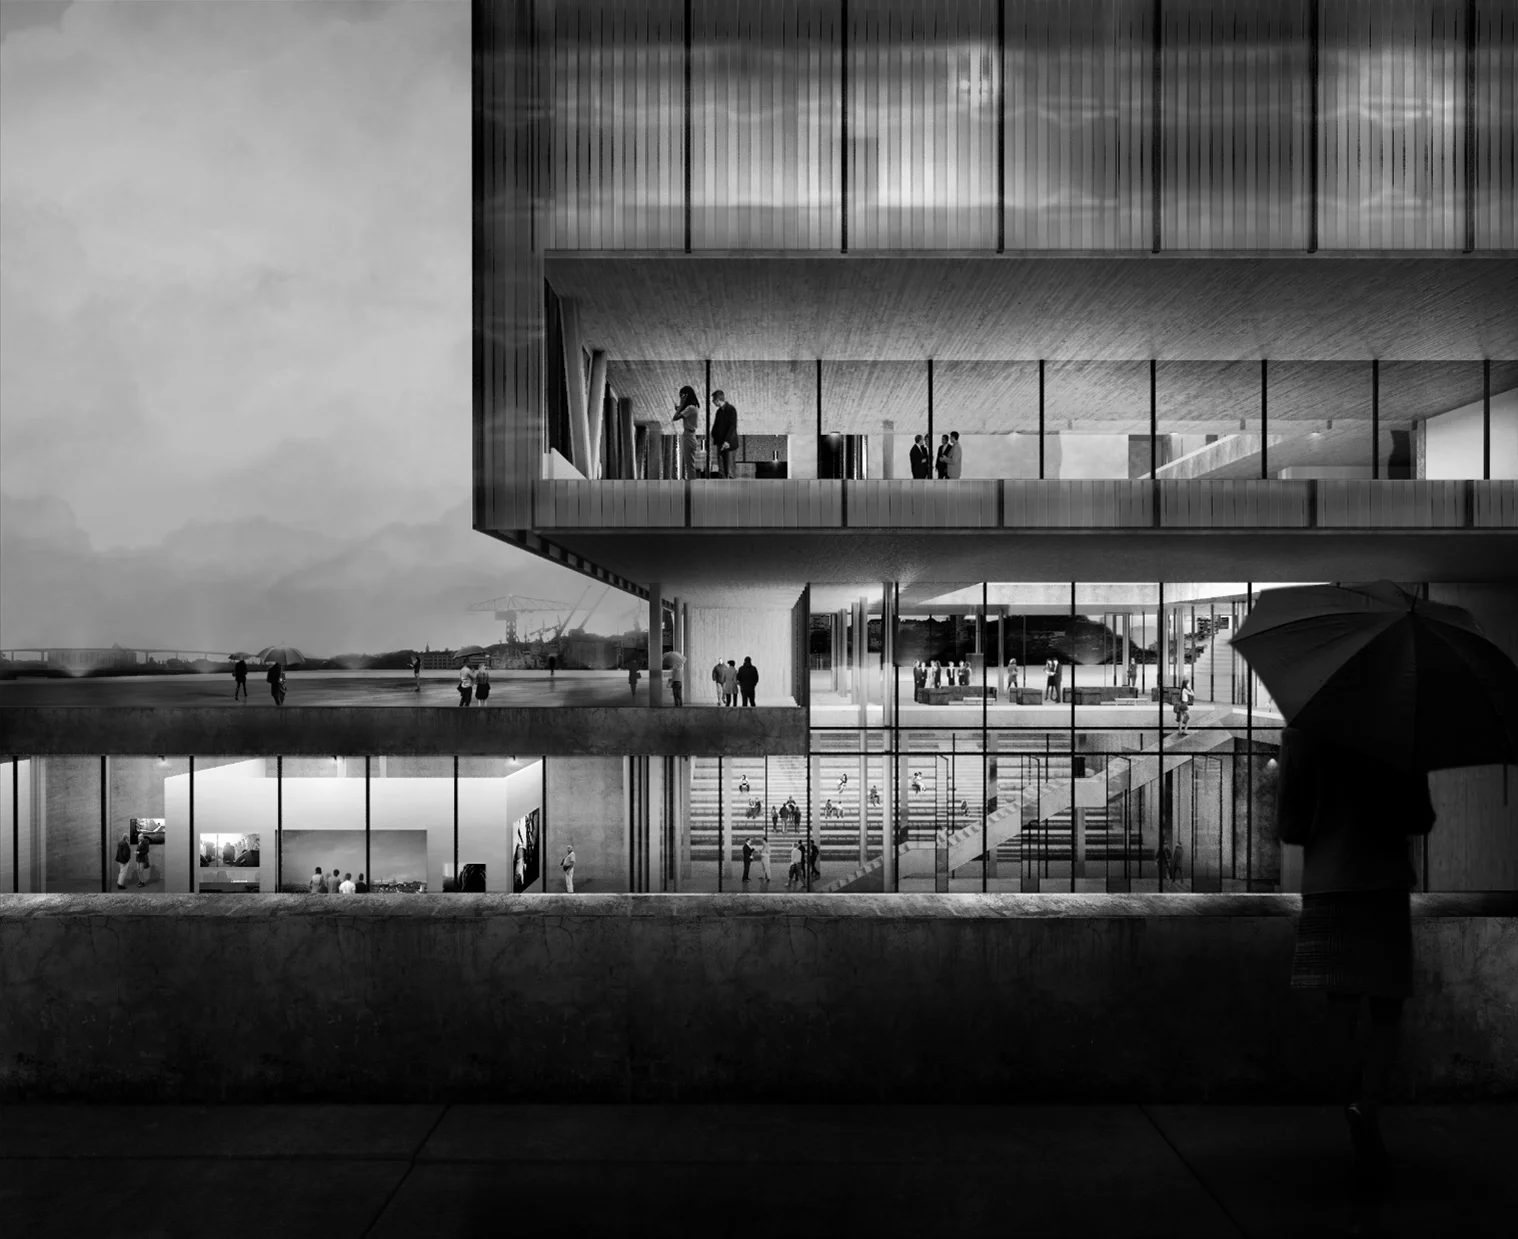
People are well integrated in their environment. The image is starting to look good but there's still one big step before calling it a day.
5. Adjust colours
View fullsize
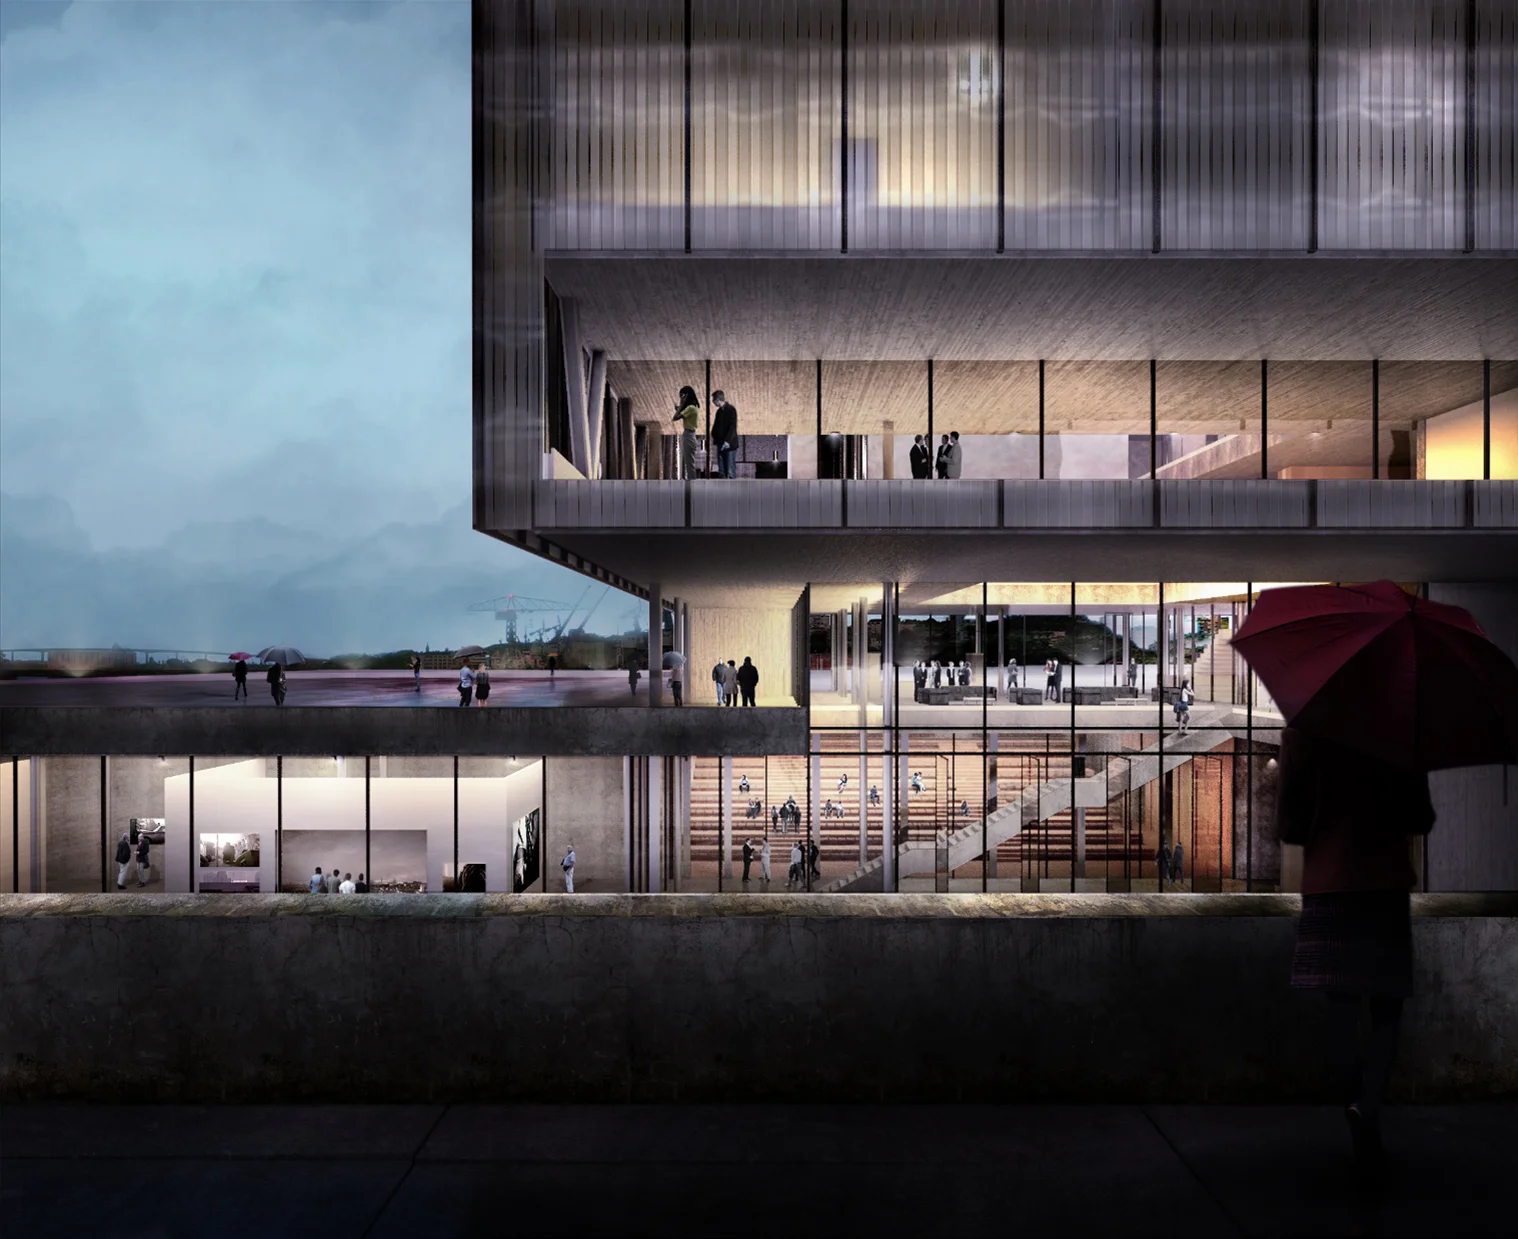
The render so far, without any colour corrections
Now, the shock! Our image looked great so far in black and white, and once we turn off our saturation adjustments (or our gradient map, whatever suits you), it is no longer as punchy and nice as we thought. It is actually, ugly...
Well yes, here comes maybe the hardest part of any image : getting the colours right. While it can be a complicated step, I'll share with you a little tip that makes it much (much!) easier to deal with.
When you know what type of mood and colours you want, it isn't always that easy to know where the problems come from in the image, what and where colours are off.
In our case, I basically wanted a strong contrast between different shades of dark and light blue for the building and the background, and different shades of yellow for the different spaces in the building.
In order to get a more comprehensive vision of the different colours, or hues, in the image, let's isolate them. To do so, we'll fill a layer with pure red (R:255 G:0 B:0) and set its blending mode to luminosity. To push up the effect even more, we'll add a hue/saturation adjustments layer and push up the saturation to something like +50 (don't forget to create a clipping mask between the saturation adjustment and the layer so that it doesn't affect the whole image. To do so simply Ctrl+Alt+G and the selected layer will be clipped by the layer underneath.)
View fullsize
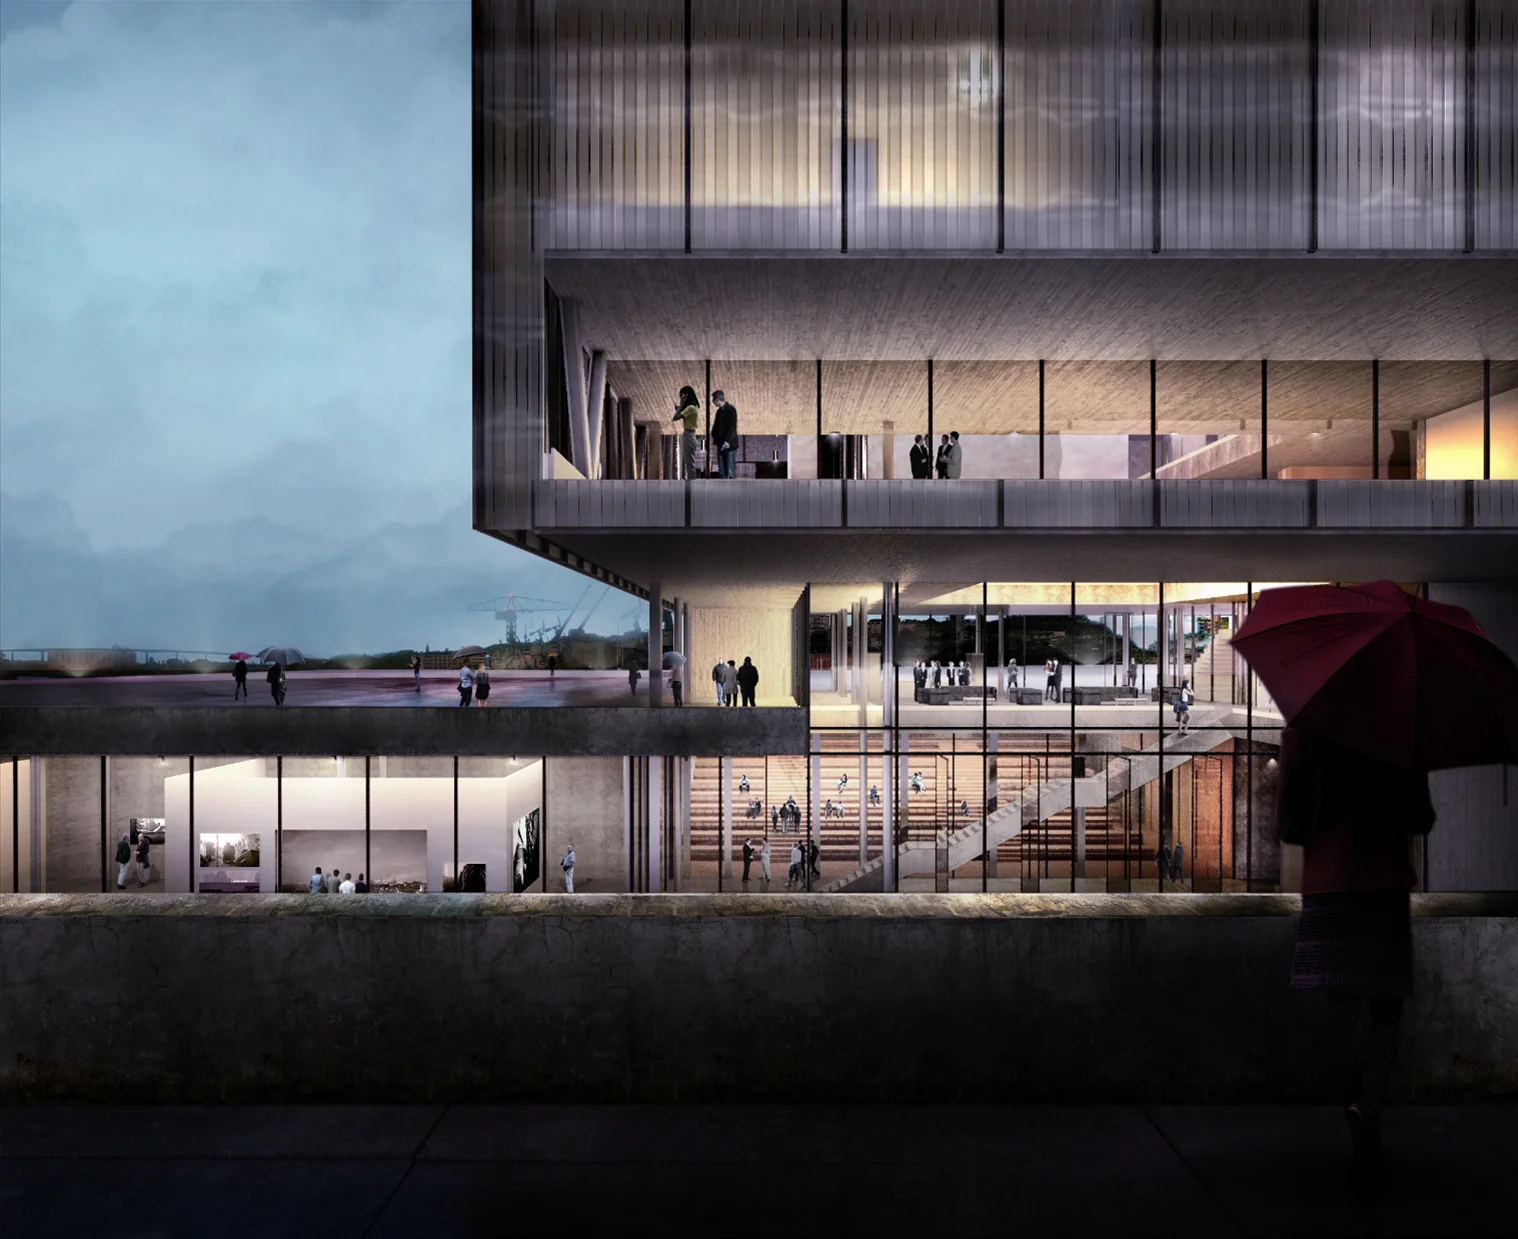
The image with its normal colours
View fullsize
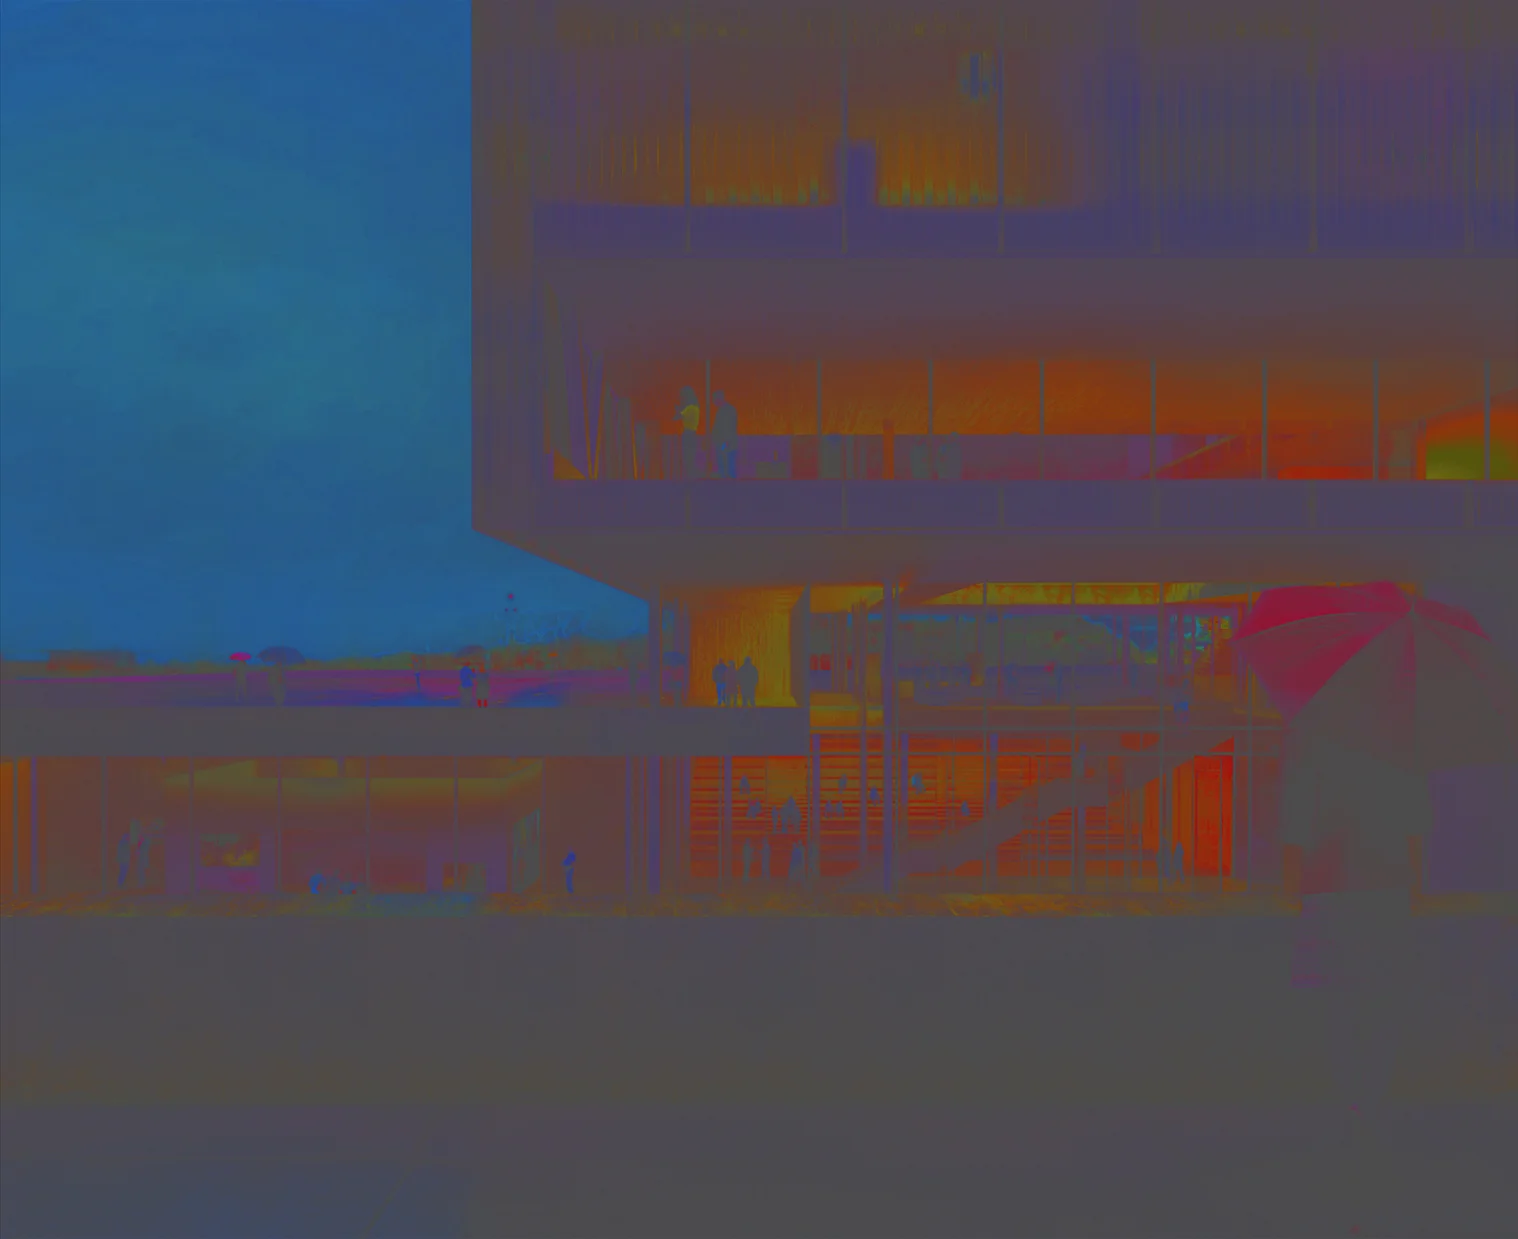
The image with our new masks : only the hues are visible
Now what you see with our mask is the different hues existing in our image. Instead of what I am looking for (shades of blue and yellow), we have a lot of purple, orangeish and even desaturated green. Not really what I was looking for.
With the help of the materialID pass from VRay (or simply by cutting out the part you need with a polygonal lasso tool) we'll start adjusting the hue for every single part of the image until it suits the aforementioned vision. To do so, basically select an area, and create a Hue/Saturation adjustment layer. It will automatically mask the unselected part and only apply the change on the selected part, then just play around with the hue adjustment of your adjustment layer until you find the colours you need.
With a bit of experience you'll know exactly what type of colours you're looking for and get a better sense of what looks good or not together. But in the meantime, what you can do is to insert a reference image in your photoshop file so that you can analyze it with our new hue mask.
View fullsize
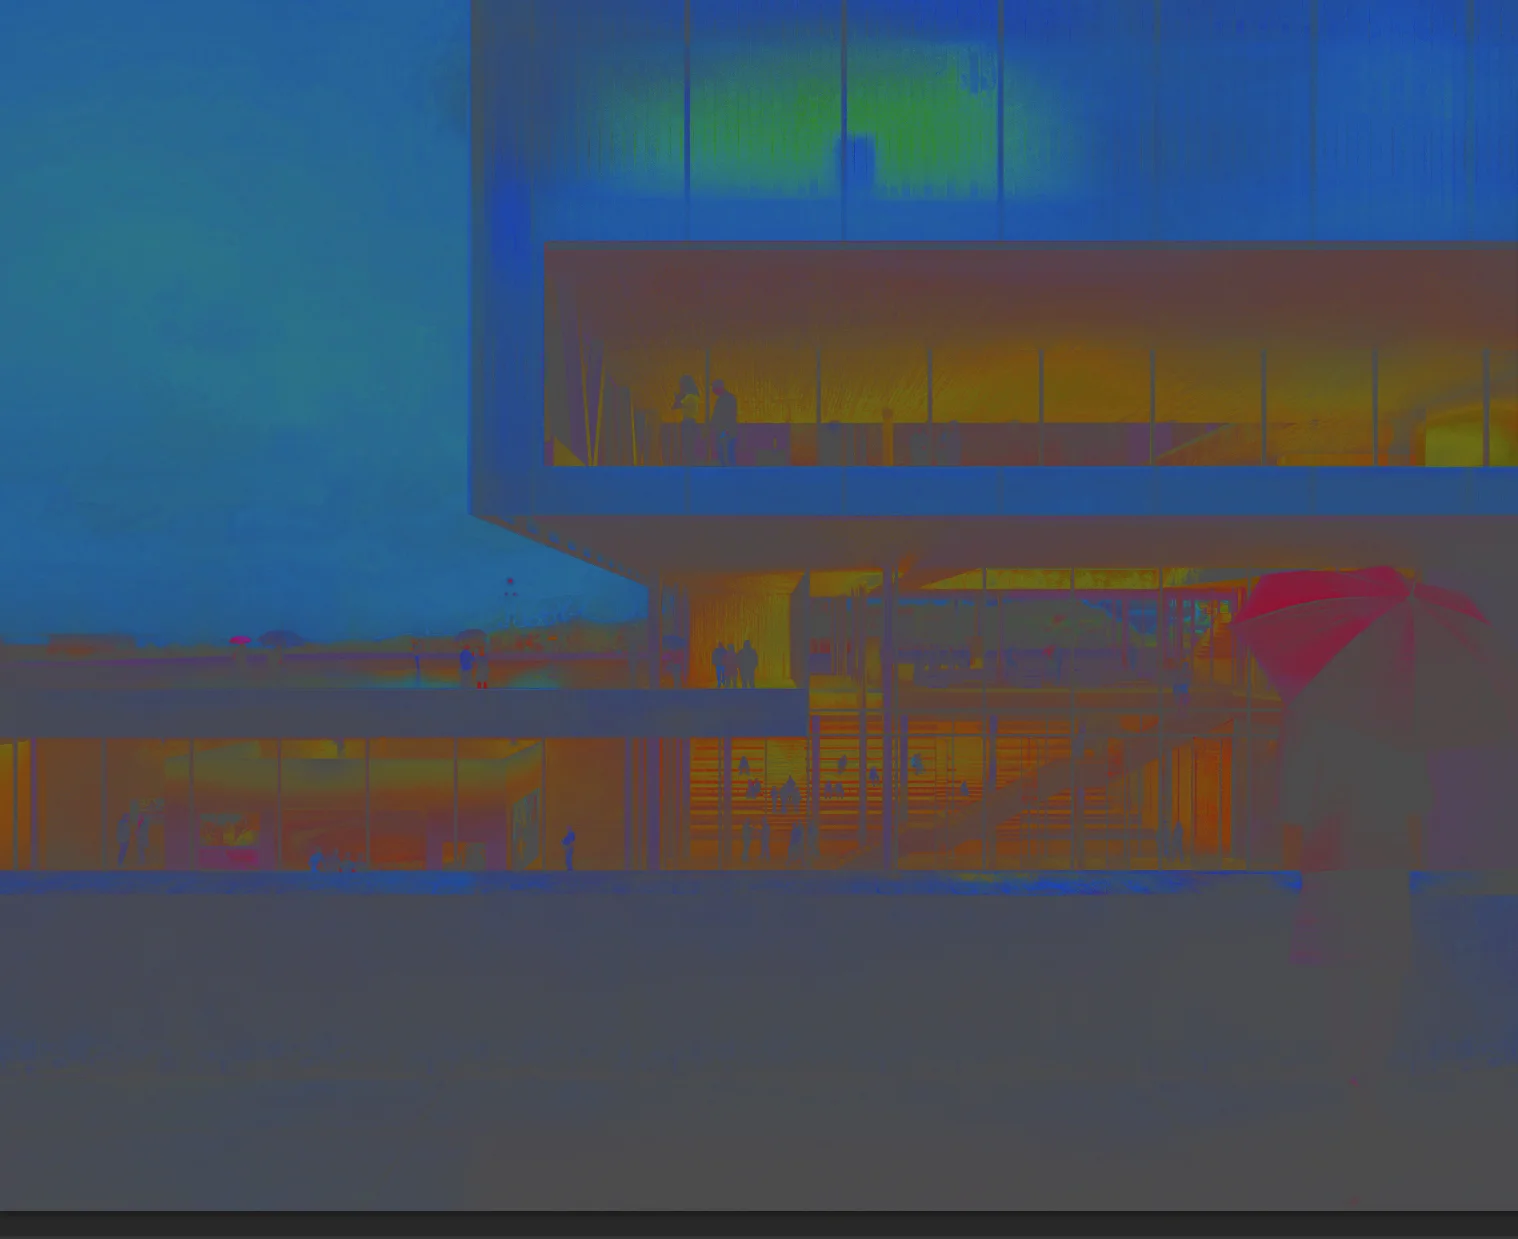
The final hue mask with final colour adjustments
View fullsize
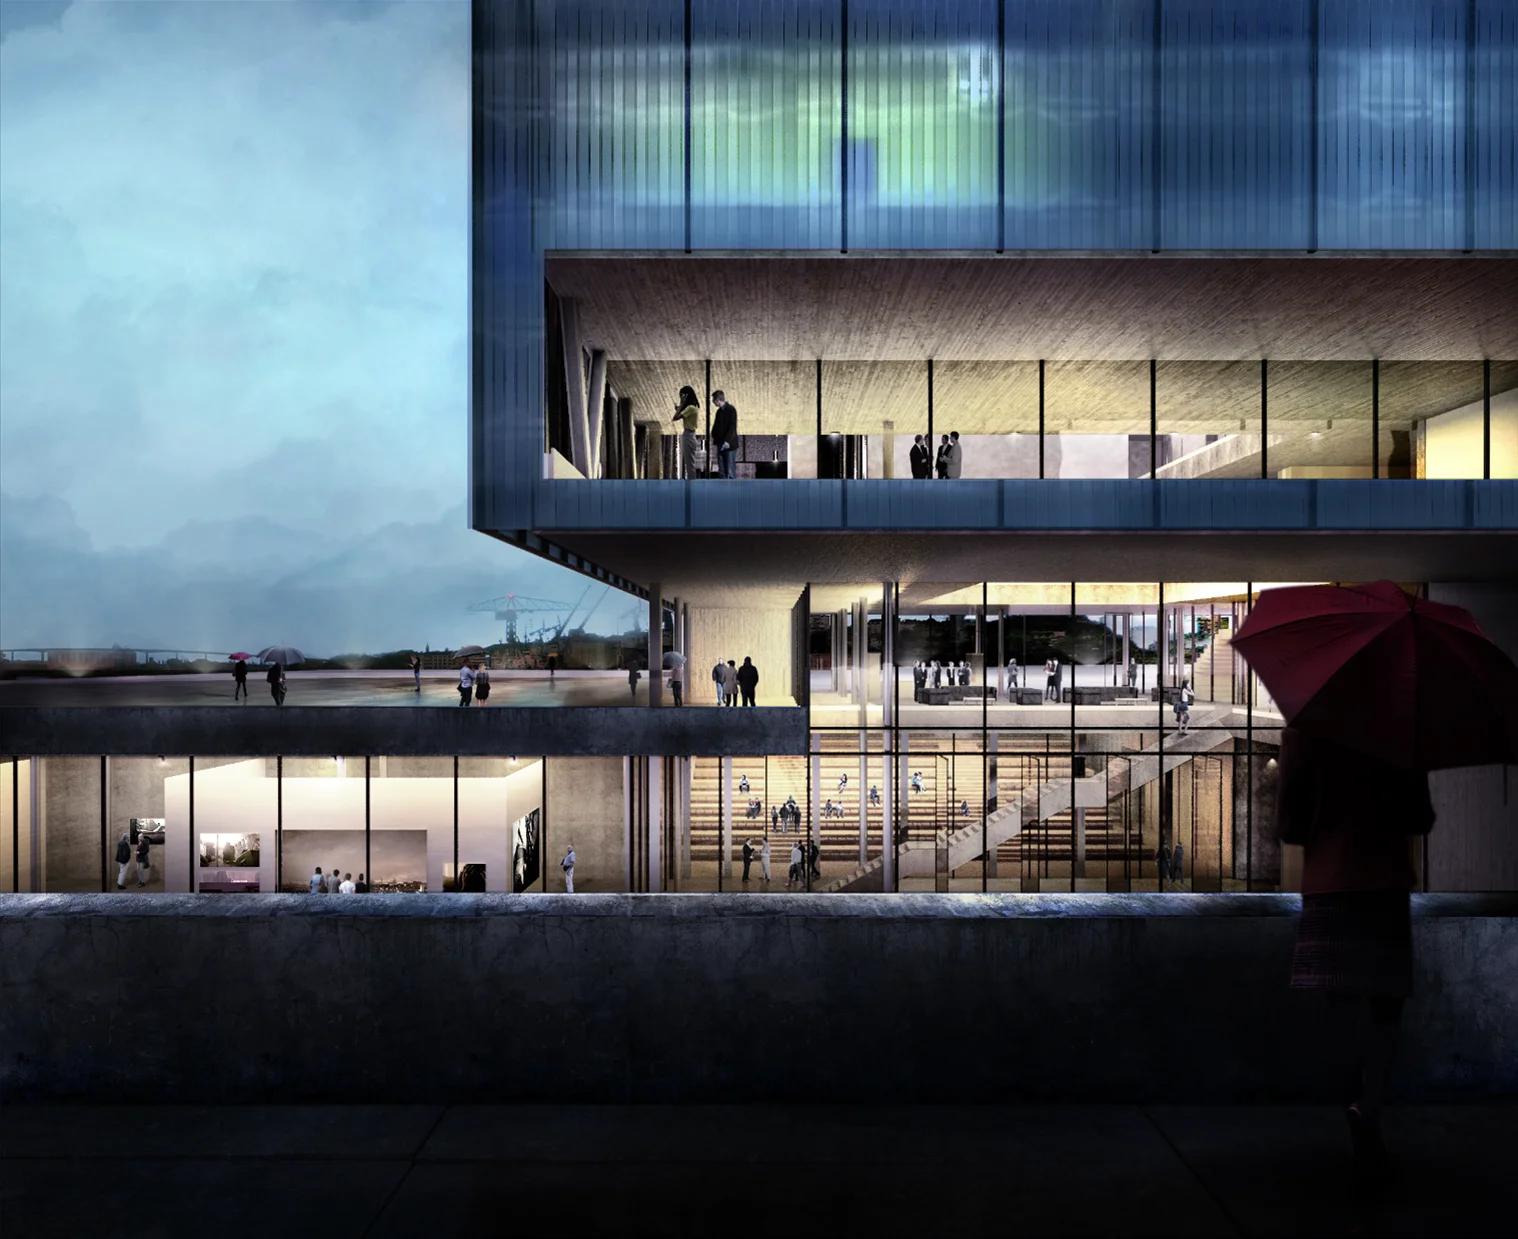
The final image with colour adjustments
I guess that's all folks, hope you enjoyed this tutorial! There will be many more to come so don't forget to subscribe to our newsletter and like our Facebook page!
For those of you who haven't seen it yet, you should check out the breakdown video for this render here to get extra details. Also C&C are always more than welcome so that I can improve parts that are still unclear to you.
Related content :
Behind the scenes 0
Behind the scenes 1
Behind the scenes 2
Making of Draped Art
Making of Photography School in Nantes